 We believe a custom home is not the process of choosing from predetermined floor plans, materials and products. A custom home is a home that is designed and built just for you and your family.
The client’s participation is the most important dynamic when building a custom home. The home must reflect the client’s personality, lifestyle functionality and utilize the building site to optimum efficiency.
 Using the TN Miller Custom Homes’ design/build method, we will work as a team with one of our “partner” architects or designers, or if the client prefers we will work with their architect or designer to produce a project to maintain the client’s design & structural intent, construction schedule and project budget thus ensuring a smooth, fun, enjoyable, building experience.
TN Miller Custom Homes offer various aesthetic and structural benefits, open plan designs, durable low-maintenance materials on the exterior and comfortable functional interiors. Thus resulting in our commitment to elegance and function.
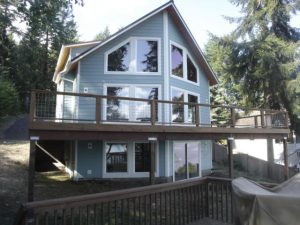
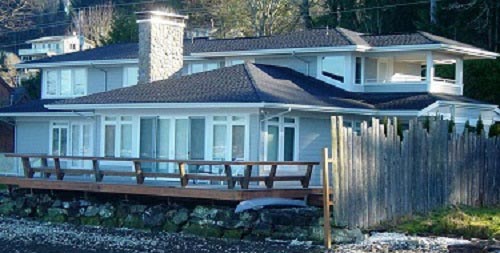
The following Custom Home Build in Belfair is a beautiful project with details images and videos, including a customer testimonial. We encourage you to review the page to see how proud we can be of our work.
The following Custom Home Build in Grapeview is a nice Vineyard Cottage.
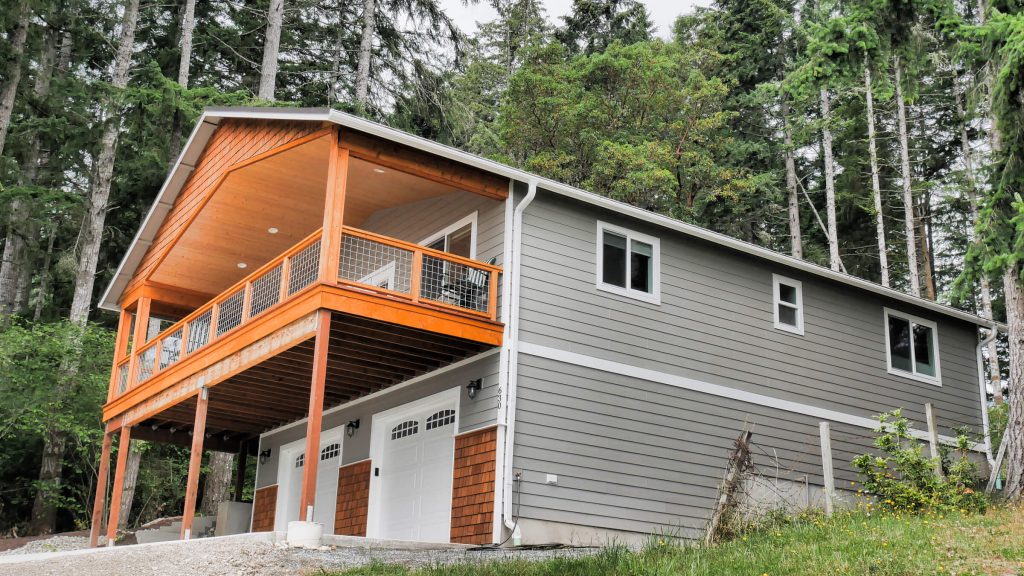
Sometimes a custom home may not be the primary residence and can be an Accessory Dwelling Unit (ADU) as seen below.
Our carpenters and craftsmen take over 40 hours of education courses on the latest construction design and techniques. They are skilled in the following construction practices
- Innovative framing for stronger sustainable structures
- Stick Frame – Post & Beam – Log Hybrid
- Specialized design and constructions of…
- Dormers
- Bump Outs
- Porticos
- Arbors
- Cathedral Ceilings
- Window Walls
- Cantilevers
- Complex Roof Lines
- Grand Entries
- Accent Exterior Trim
- Stylish Decks, Porches, Railings
- Creative Layout & Installation of Siding & Stone
Award Winning Interior Design & Construction
- Drywall Sculpturing & Layering
- Barrel & Raised Ceilings
- Interior Trim Design & Construction
- Sophisticated Stair Systems
- Paneling & Wainscoting
- Custom Cabinetry Design & Construction
- Fireplace Trim & Mantels
- Tile & Stone Design & Installation
Cap Code, Colonial, Craftsman, European, Farm House, Traditional, Post & Beam are all common classification of house styles and are great way to illustrate the initial design style of a custom home. Using this information as a base about a client’s tastes and wants, we will start the design process.
We are masters of space manipulation. Think as freely as possible about the qualities of the spaces and places you have most loved and hated in your previous homes or homes you have admired.
A small square foot floor plan will feel spacious and a sizeable square foot floor plan will feel.
Organized by following these design principles
- Organize the floor plan around activities, such as eating dinner, doing a craft or hobby, or greeting visitors, rather than around preconceived rooms. Look for the centers of action, movement, and attention; then shape spaces around them.
- Minimize circulation space by reducing or eliminating hallways and paths to and from rooms. Enrich the pass-through experience with bookcases, niches, skylights, or textures.
- Avoid circulation paths that cut diagonally through a space. This can potentially give the floor plan a “chopped up” feel.
- Minimize interior walls. Try not to close rooms off from each other.
- Consider partial separations between rooms to create an ambiguity of connectedness such as; arches, interior windows, half-walls, interior columns, and similar features. Often there are reasons for partially separating one space from another, without needing to devote a separate room to each.
- Minimize the number of doors, after considering your real need for privacy.
- If a door swing seems to take up too much space or unavoidably conflicts with something else, consider a sliding ‘pocket’ door.
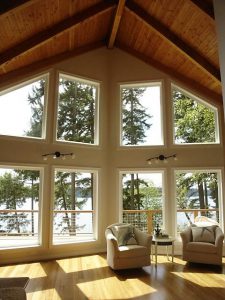
- Whether your building site is located on water, a large partial of land or in a development utilize natural light: via window walls, roof windows, skylights, or porch roofs high enough to let you see some sky from inside the house. Look also for ways to appreciate or enhance the smaller views, since intimate, small-scale views can be just as enjoyable as sweeping, dramatic ones. The perceptual effect of a view is to expand the space from which you see it.
- Have a diversity of windows. A single glass block or 1-square-foot (.09-square-meter) window can energize a large blank wall, and ‘zen views’ can make much of a smaller window.
- Have easy connections between inside and outside spaces, such as patios, decks, and outdoor showers, designing them as outdoor rooms with their own definition and sense of partial enclosure. Because of seasonal variations in your climate, you may need different outdoor spaces for winter and summer use.
- Avoid right angles as much as is permitted by your budget. Where you do have them, consider softening them by sculpting your wall material by using trim, ornament, or a built-in feature like a fireplace or display cabinet.
- Vary ceiling height by generally giving smaller spaces lower ceilings. This will dramatize the perceived size of the larger spaces by increasing the contrast between spaces. Floor levels can also be varied — even a few inches of difference adds to the diversity and apparent size of a space.
- Avoid flat ceilings; instead, use open trusses, curved vaults, or cornices. A shape that rises will pull your feelings up with it.
- Plan lighting to create pools of light, rather than uniform illumination everywhere.
Of course these guidelines aren’t absolute, and sometimes the exceptions are as intriguing as the rules! Nevertheless, well-crafted houses embody most of these principles.